
If you read my previous blog post you know I have been working on a Bot with the Microsoft Bot Framework. After some time developing the Bot it became time to start thinking about how to release the Bot to Azure. I always like to automate the provisioning of Azure resources as part of a release and I’ve used Azure Resource Manager templates (ARM templates) for this in other projects.
An ARM template is a JSON file in which Azure resources that we want to provision are declaratively described. An ARM template is idempotent, which means it can be executed many times, and the result will always be the same. Azure takes care of the execution and identifies the changes that need to be executed. This is ideal when doing Continuous Deployment (CD). I liked working with them and because friends don’t let friends right-click publish I decided to also use ARM templates in combination with Azure DevOps Pipelines to release this Bot project.
Because this Bot is basically a Web App, and I’ve created ARM templates for Web Apps before, I thought it wouldn’t be a problem to set up Continuous Deployment for the Bot in Azure DevOps Pipelines. Well, it turned out to be more challenging than expected. In this blog post I would like to share with you how I went about setting up CD for a Web App Bot created with version 4 of the Bot Framework. The Bot contains the services you would typically expect to be present in a Bot like LUIS and Application Insights.
As I was writing this blog post I noticed it was getting pretty long, so I decided to split the post in two parts. This first part will cover setting up a Bot project with LUIS and Application Insights and creating a basic Continuous Integration (CI) build for this project in Azure DevOps Pipelines. If you already have a Bot configured with LUIS and Application Insights you probably can skip most of this first part and continue with part 2 where we will create the ARM template and the release pipeline for the Bot project.
Setting up the Bot Project
We first need a functional Bot on our development environment before we can start thinking about deploying it with the help of a Release pipeline in Azure DevOps. If you already have a Bot with Application Insights and LUIS configured then you can skip this and continue with setting up CI. If you don’t, I’ll show you how we can use one of the projects in the BotBuilder-Samples GitHub repository to get up and running quickly.
For this blog post I will use the LUISBotAppInsights Bot from the BotBuilder-Samples GitHub repository because this has most of the code and configuration we will need already available. However, we still need to complete some steps before we can run the Bot project and start a conversation without any errors.
Step 1: Add bot configuration file
After cloning or downloading the samples GitHub repository the projects will not have a bot configuration file. We will need to create one before we can start adding external services like Application Insights and LUIS. Read this blog post by Martin Kearn if you want to learn more about the bot configuration file.
Navigate to the folder containing the project, open a command prompt and type msbot to verify you have the MSBot CLI installed. If the command is not recognized install the MSBot CLI by running the following npm command:
npm install -g msbot
Now run the init MSBot command to create the configuration file (.bot)
msbot init
You will be prompted to name your Bot and provide an endpoint. I choose ‘BvuBotv4’ and accepted the defaults for all other questions. This will give you the following response:
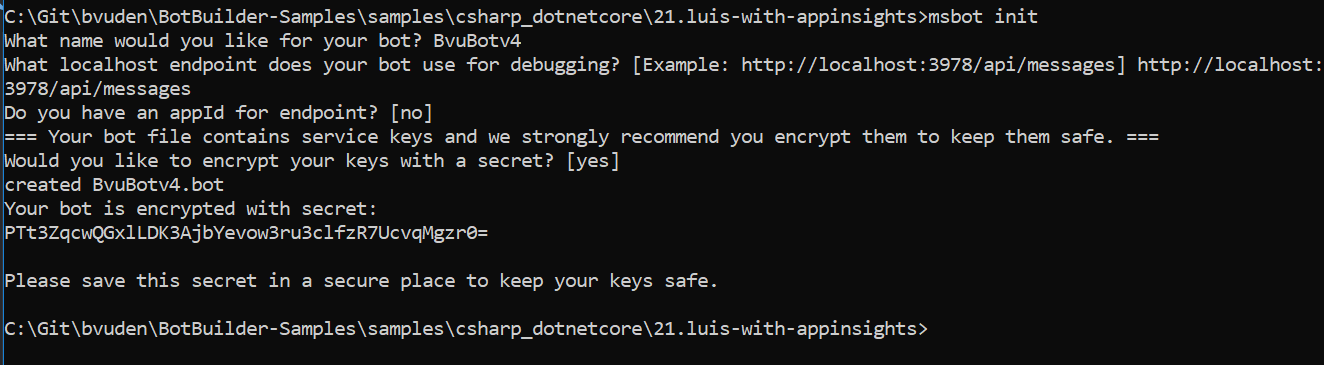
run msbot init
Don’t forget to make a note of the secret! We will need it when we want to read from, or make changes to the .bot configuration file. A .bot file with the same name as the Bot is created and added to our project, it should look something like this:
{
    "name": "BvuBotv4",
    "services": [
        {
            "type": "endpoint",
            "name": "BvuBotv4",
            "endpoint": "http://localhost:3978/api/messages",
            "appId": "",
            "appPassword": "",
            "id": "162"
        }
    ],
    "padlock": "BWYSjyWSjeeoegggyc1yEQ==!JdLXy3pS3R+J1soXjRxWuD2VwLazJ+plrnyn9BmxBVlp9rD0JCy7p/rwiR62DIgW",
    "version": "2.0"
}
Step 2: Update appsettings.json
Open appsettings.json and replace the default values for botFilePath and botFileSecret.
{
    "botFilePath": "<YOUR BOT CONFIG>.bot",
    "botFileSecret": "<YOUR SECRET>"
}
In my opinion it’s confusing to use both a botconfiguration file and an appsettings.json file. Since we have the bot file secret in appsettings.json it makes sense to me to add User Secrets to the project and move the values from appsettings.json there. After that, appsettings.json can be removed from the project. Choose a method you prefer, both methods can be used here.
Step 3: Configure endpoints
The code assumes the Bot has two endpoints, one for development and one for production. Copy and paste the endpoint section, rename one to ‘development’ and the other to ‘production’. Also change the ‘id’ for the production endpoint to make it unique. Don’t worry about the url for the production endpoint, we will fix this when we build the release pipeline. The updated .bot file should now like like this:
{
  "name": "BvuBotv4",
  "services": [
    {
      "type": "endpoint",
      "name": "development",
      "endpoint": "http://localhost:3978/api/messages",
      "appId": "",
      "appPassword": "",
      "id": "162"
    },
    {
      "type": "endpoint",
      "name": "production",
      "endpoint": "http://localhost:3978/api/messages",
      "appId": "",
      "appPassword": "",
      "id": "163"
    }
  ],
  "padlock": "BWYSjyWSjeeoegggyc1yEQ==!JdLXy3pS3R+J1soXjRxWuD2VwLazJ+plrnyn9BmxBVlp9rD0JCy7p/rwiR62DIgW",
  "version": "2.0"
}
Step 4: Add Application Insights service
The code in the project also assumes we have Application Insights added as a service to the .bot file. My previous blog post describes how you can do this. I suggest you read that if you need some guidance. TL;DR, create an Application Insights instance in Azure and use the Instrumentation Key when adding the service with the msbot connect appinsights command. Check the .bot file after running the command to verify Application Insights has been added to the services section.
Step 5: Add LUIS service
The last step is to create a LUIS project and add it as another service to the Bot. Depending on where you are located visit eu.luis.ai (Europe), au.luis.ai (Australia) or www.luis.ai to create a new LUIS project. After you created a new project navigate to Manage and make a note of the Application ID.
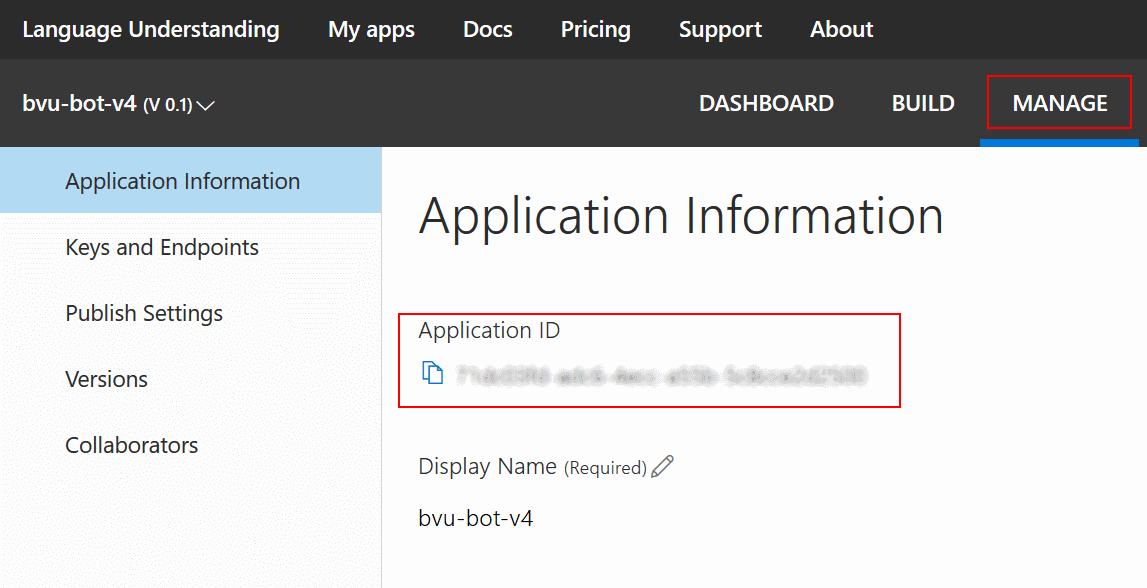
LUIS Application ID
We also need a key to be able to call the LUIS API from our Bot. For now we will use the starter key that is provided for free but we will change to our own key later after we have provisioned our LUIS Cognitive Service in Azure. Navigate to Keys and Endpoint (under Manage) and make a note of the Authoring Key
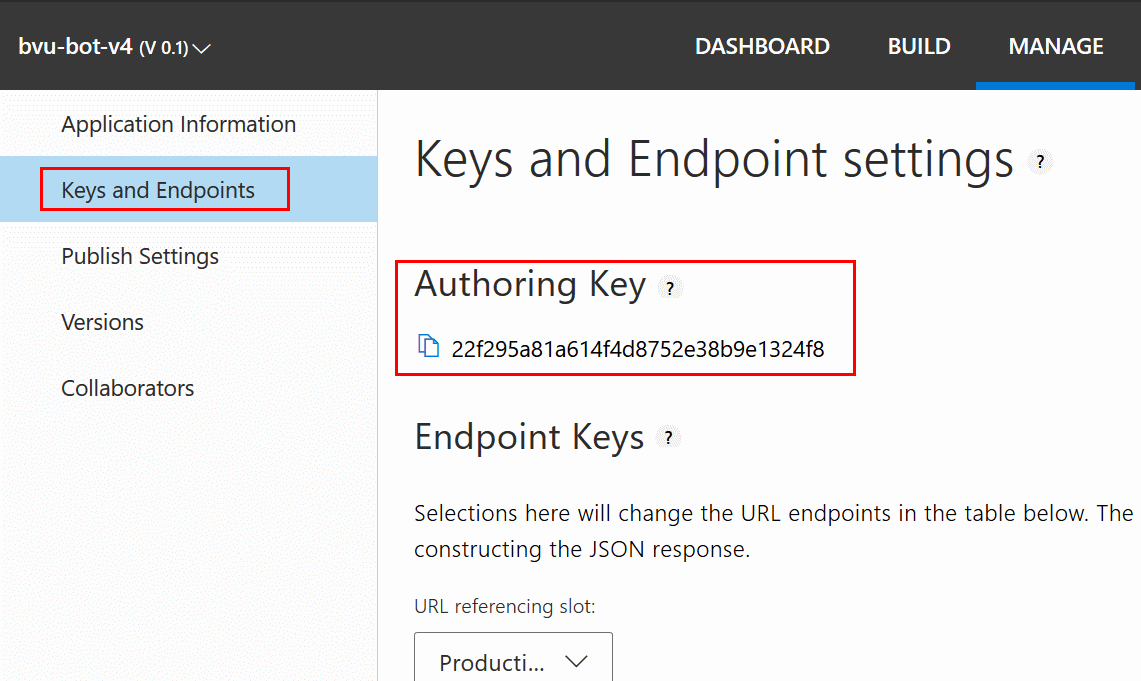
LUIS Authoring Key
Run msbot connect luis with values for the following required parameters to connect the bot to the just created LUIS application:
–name (name for the LUIS service used in the bot file, choose your own)
–appId (the Application ID from the LUIS project)
–version (the version of the LUIS project)
–region (the region of the Starter_Key resource in the LUIS project, f.e. westeurope)
–authoringKey (the Authoring Key/key1 of the Starter_Key resource in the LUIS project)
–subscriptionKey (if you use the free Starter_Key it’s the same value as the authoringKey, if you use your own key it’s your Azure Subscription Id)
–secret (the botfile secret)
msbot connect luis --name luisService --appId {ApplicationId} --version 0.1 --region westeurope --authoringKey {AuthoringKey} --subscriptionKey {subscriptionKey} --secret {BotFileSecret}
The command will return something like this:
{
  "type": "luis",
  "name": "luisService",
  "appId": "xxxxxxxx-xxxx-4ecc-a55b-xxxxxxxxxxxx",
  "version": "0.1",
  "authoringKey": "22f295a81a614f4d8752e38b9e1324f8",
  "subscriptionKey": "22f295a81a614f4d8752e38b9e1324f8",
  "region": "westeurope",
  "id": "195"
}
Open the LuisBot.cs file and update the value of the LuisKey field to the name of the created LUIS service. In our case that’s ‘luisService’.
public static readonly string LuisKey = "luisService";
Now the Bot should be ready to take for a spin. Open the Bot Framework Emulator, connect to the .bot file and verify the Bot is working correctly. Because we haven’t added any intents to the LUIS project we will see the following reply after sending a message to the Bot.
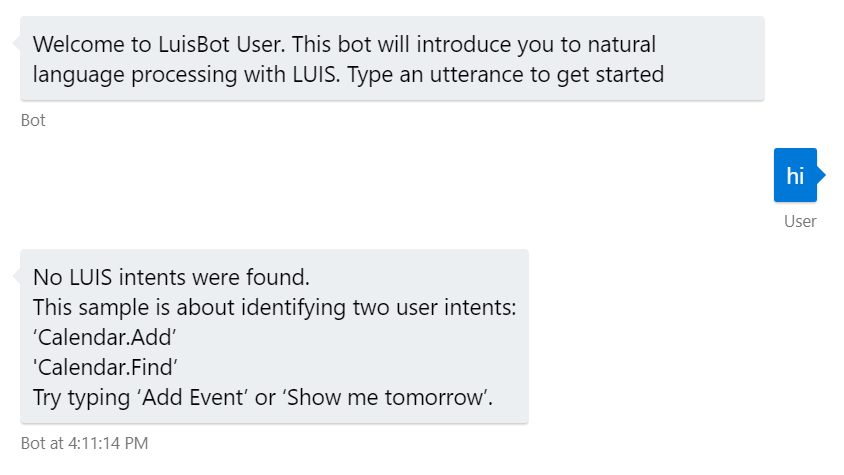
Use the Bot Emulator to verify we can start a conversation
That’s fine for now, for this post we do not need to configure the LUIS project, we just need to make sure the Bot has access to it and we can start a conversation.
Setting up a Continuous Integration Build
Before we can setup Continuous Deployment we first need to create a Continuous Integration build that will create a zip file (artifact) of our project to deploy. Because a Web App Bot is basically an ASP.NET Core project this step is quite straightforward.
Create a new Build Pipeline in Azure DevOps Pipelines and select the ASP.NET Core template.
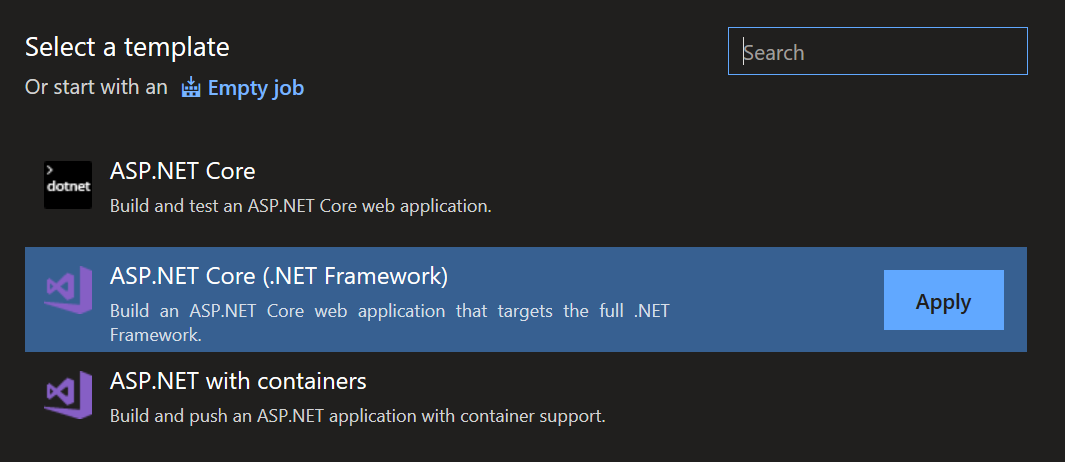
Select ASP.NET Core template
If you are using the BotBuilder-Samples repository you need to make some changes to the Visual Studio Build Task, The default setting is to build the entire solution, but in this case we only need to build (and deploy) one of the sample projects in the solution. Click on the link settings in the build task and unlink.
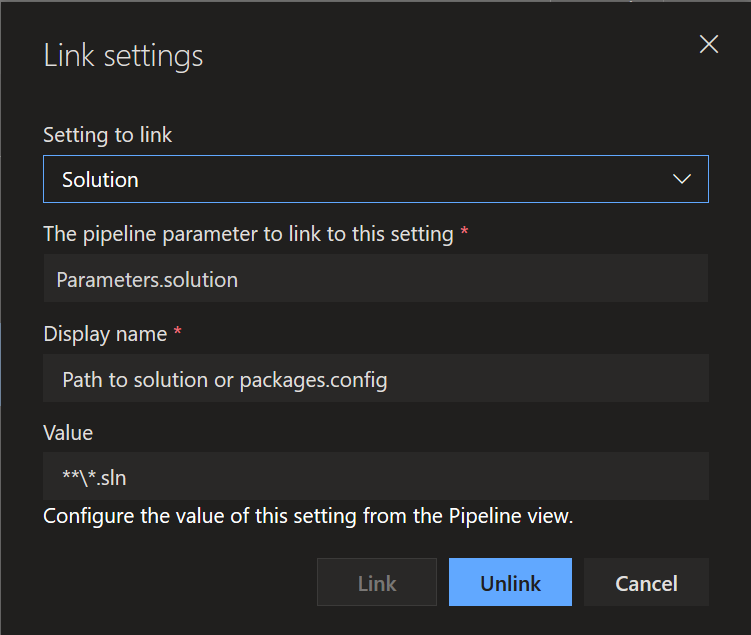
Link settings
Now we can change the value of the solution to only build the LuisBotAppInsights project.

Only build LuisBotAppInsights project
All other tasks with their defaults are fine for now, but you might want to change the name of the build. You can remove or disable the Unit Test task if you haven’t added Unit Tests to the Bot.
Now save and queue a new build. When the build is completed check the artifacts to make sure it has a drop folder with a zip file containing the build project.
Navigate to triggers, check the enable continuous integration option and select a branch. This will trigger a new build every time we push changes to that branch.
Summary
In this first blog post we mainly focused on laying the groundwork for the release of the Bot. We made some adjustments to an existing Bot Project from the Bot Builder Samples repository and configured it to use LUIS and Application Insights as external services. We tested the Bot with the Bot Framework Emulator to verify it works correctly locally on our development environment. Then we created a continuous integration build in Azure DevOps Pipelines. The build triggers every time we push changes to our working branch and creates an artifact containing the Bot’s binaries.
In the next post we will focus on deploying the Bot to Azure. We will create an ARM template to declaratively describe the resources we need to provision on Azure and we will create the actual release pipeline in Azure DevOps. In the release pipeline we will use the ARM template to automatically create the resources in Azure and use the artifact created in the build pipeline to deploy the Bot there.