
Recently I had the opportunity to work on a conversational agent (bot or chatbot) with the Microsoft Bot Framework and the Azure Bot Service. For this particular project we decided to use the new version of the Framework that went GA at Ignite 2018 and build our bot with the Bot Builder C# SDK (v4). Because this version is still relatively new, some of documentation and samples aren’t completely up-to-date. While I was working on the project I could find bits and pieces of information in the docs and samples but sometimes end-to-end guidance was missing. That’s why I decided to write some blog posts with my findings to hopefully help some of you to get up and running quickly with version 4 of the Framework and the Bot Builder SDK.
One of the changes in this new version is the use of .bot files to store and manage secrets and configuration information for bots and any external service it uses. According to Microsoft all bot configuration should be stored in the .bot file, however when I was reading up on how to add Application Insights, I found appsettings.json still being used.
In this blog post we will add the Application Insights configuration settings to the .bot file, use the .bot file to create an Application Insights service in our bot and use this service to write telemetry to an Application Insights resource in Azure.
So what is this .bot file? #
Before we get started let’s first take a quick look at his new way of storing configuration. The .bot file is a JSON document that stores configuration information for your bot and the external services it uses (f.e. Application Insights, LUIS, QnAMaker, Blob Storage or CosmosDB). You can compare it to the appsettings.json file in an ASP.NET Core application.
It’s not a requirement to use the .bot file, you can still use appsettings.json if you like. So why would you switch to the .bot file when you are developing your bot with the C# SDK that uses ASP.NET Core?
According to the official documentation the advantages of using .bot file are:
- Bot Builder V4 SDK will be available in 4 platforms x languages – C#, JS, Python, Java. Each platform have their recommended way of keeping track of keys + env settings (appsettings.json, web.config, .env …).
- Elegant tooling solutions around services creation and management is harder without a well defined schema (.bot file).
- Bot Framework Emulator, CLI tools rely on and work great with tracking connected services in a consistent format (in a .bot file)
In other words, the .bot file provides a consistent way of working with settings across the different platforms and languages and it makes it easier to work with bot tools like the Bot Framework Emulator and the MSBot CLI.
I’m sure there will also be some disadvantages when using the .bot file instead of appsettings.json, but for now let’s stick with the preferred method and use the .bot file to add Application Insights to our bot.
Getting things ready #
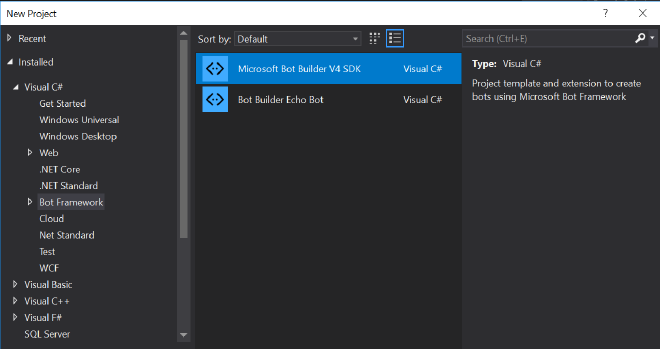
If you don’t have a bot yet, you can create a new one using the Bot Builder V4 SDK Template for Visual Studio or the Yeoman BotBuilder Generator. In this post we will create a new bot with the Visual Studio Template.
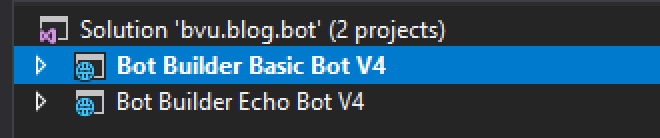
The template will create a new solution with two projects, Bot Builder Basic Bot V4 and Bot Builder Echo Bot V4. We will use the Basic Bot project in this post because it already has some boiler-plate code that we can use.
Also create an Application Insights resource in Azure and make a note of the Instrumentation Key for later use. Once the Application Insights instance is created you can find the Instrumentation Key in the overview blade.
Next we will install the <a href="https://github.com/Microsoft/botbuilder-tools/tree/master/packages/MSBot" target="_blank" rel="noopener">MSBot CLI</a> tool. This command line tool can create and manage bot resources described via the .bot file. Install the msbot tool using npm:
npm install -g msbot
Add Application Insights configuration to the .bot file #
Open a command prompt and navigate to the folder containing the .bot file (by default this is the root folder of your project). When you run MSbot commands from a different folder you can also specify the path to the .bot file in your command using the -b (or –bot) parameter.
Run msbot connect appinsights with values for the following required parameters to connect the bot to the just created Application Insights instance:
–serviceName (service name that will be used in the bot file, choose your own)
–tenantId (you can find the tenantId as the Directory Id in the properties blade of your Azure AD)
–subscriptionId (Id of the subscription in which you created the Application Insights instance)
–resourceGroup (Name of the resource group were you created the Application Insights instance)
–instrumentationKey (Application Insights Instrumentation Key)
msbot connect appinsights --serviceName appinsightsService --tenantId {tenant-id} --subscriptionId {subscription-id} --resourceGroup bvu-blog-bot --instrumentationKey {instrumentation-key}
The command will return something like this:
{
"type": "appInsights",
"name": "appinsightsService",
"tenantId": "xxxxxxxx-c9f8-4d29-xxxx-xxxxxxxxxxxx",
"subscriptionId": "xxxxxxxx-473c-4e89-xxxx-xxxxxxxxxxxx",
"resourceGroup": "bvu-blog-bot",
"serviceName": "appinsightsService",
"instrumentationKey": "xxxxxxxx-f234-4bec-xxxx-xxxxxxxxxxxx",
"apiKeys": {},
"id": "81"
}
When we open the .bot file we can see that this output has also been added to the services section.
{
    "name": "Bot_Builder_Basic_Bot_V4",
    "description": "",
    "services": [
        {
            "type": "endpoint",
            "name": "development",
            "endpoint": "http://localhost:3978/api/messages",
            "appId": "",
            "appPassword": "",
            "id": "1"
        },
        {
            "type": "appInsights",
            "name": "appinsightsService",
            "tenantId": "xxxxxxxx-c9f8-4d29-xxxx-xxxxxxxxxxxx",
            "subscriptionId": "xxxxxxxx-473c-4e89-xxxx-xxxxxxxxxxxx",
            "resourceGroup": "bvu-blog-bot",
            "serviceName": "appinsightsService",
            "instrumentationKey": "xxxxxxxx-f234-4bec-xxxx-xxxxxxxxxxxx",
            "apiKeys": {},
            "id": "81"
        }
    ],
    "padlock": "",
    "version": "2.0"
}
Now that we have the Application Insights configuration we can use it to add an Application Insights service to our bot’s services.
Add Application Insights to the bot’s services #
The Basic Bot project should have the following code in the ConfigureServices method in Startup.cs:
var botConfig = BotConfiguration.Load(botFilePath ?? @".\BotConfiguration.bot", secretKey);
services.AddSingleton(sp => botConfig ?? throw new InvalidOperationException($"The .bot config file could not be loaded. ({botConfig})"));
services.AddSingleton(sp => new BotServices(botConfig));
This will read the .bot configuration file and will load the services configuration to an instance of the BotConfiguration class. This needs to be passed as parameter to the constructor of the BotServices class. With the BotServices class we can access and use the external services in our bot’s code.
Now replace
services.AddSingleton(sp => new BotServices(botConfig));
with
var botServices = new BotServices(botConfig);
services.AddSingleton(sp => botServices);
This way we have the instance of the BotServices available as a variable and can use it in the ConfigureServices method. Bot Builder version 4 is build with .net core 2.0 so we can use the built-in dependency injection features. We add the variable as a singleton to the IServiceCollection.
Now install the Microsoft.ApplicationInsights.AspNetCore NuGet package so we can use it in BotServices.cs.
dotnet add package Microsoft.ApplicationInsights.AspNetCore
The last step is to add the Application Insights service to the BotServices class. Open the BotServices.cs file and add the ServiceTypes.AppInsights case to the switch statement in the constructor of the BotService class.
foreach (var service in botConfiguration.Services)
{
    switch (service.Type)
    {
         case ServiceTypes.AppInsights:
            {
                var appInsights = (AppInsightsService)service;
                if (appInsights == null)
                {
                    throw new InvalidOperationException("Application Insights is not configured correctly in the '.bot' file.");
                }

                if (string.IsNullOrWhiteSpace(appInsights.InstrumentationKey))
                {
                    throw new InvalidOperationException("The Application Insights Instrumentation Key is required. Please update the '.bot' file.");
                }

                var telemetryConfig = new TelemetryConfiguration(appInsights.InstrumentationKey);
                TelemetryClient = new TelemetryClient(telemetryConfig)
                {
                    InstrumentationKey = appInsights.InstrumentationKey,
                };
                break;
            }
    }
}
This will loop over all the services that are available in the botConfiguration. If an AppInsights service is found it will create a TelemetryClient with the InstrumentationKey that is made available by the botConfiguration (which is loaded from the .bot file).
The TelemetryClient property is not defined yet, so let’s add it to the class to make our code compile again.
public TelemetryClient TelemetryClient { get; set; }
Now we can use this TelemetryClient property of BotServices to write to Application Insights.
Use Application Insights in the bot #
Head back the ConfigureServices method in Startup.cs and look for the following code block which catches any errors that occur in our bot during a conversation turn:
options.OnTurnError = async (context, exception) =>
{
    logger.LogError($"Exception caught : {exception}");
    await context.SendActivityAsync("Sorry, it looks like something went wrong.");
};
Replace
logger.LogError($"Exception caught : {exception}");
with
botServices.TelemetryClient.TrackException(exception);
to write exceptions to our Application Insights resource running in Azure. We can use dependency injection to make the BotServices (with it’s TelemetryClient property) available in our bot’s Dialogs or other classes.
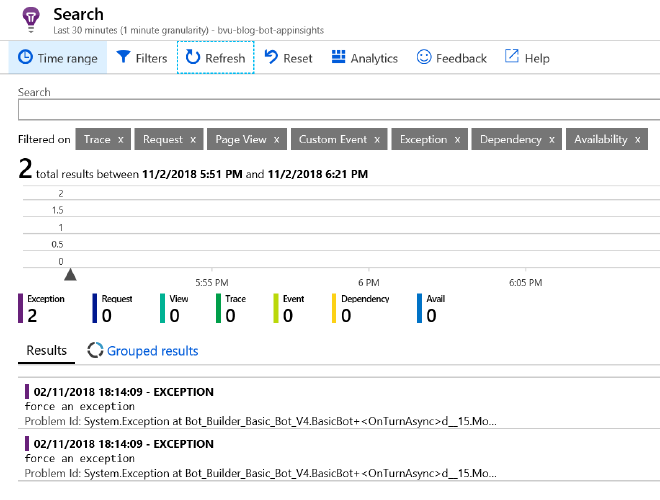
To test if everything works as expected I forced the bot to throw an exception and checked if it was logged in Application Insights.
Summary #
In this blog post we added Application Insights configuration to the .bot file using the MSBot CLI. Then we used this configuration data to add the Application Insights service to the botservices collection. Finally we used the botservice to write exceptions that occur during a conversation to Application Insights.
This is just a basic implementation with the purpose of getting you started. A lot more is possible with Application Insights in a bot. You can add it to� Middleware for easier logging of activity messages. You can add Custom Events that can help you better understand the interactions between users and bot so you can improve the user experience. An example could be to track how long it takes users to complete a certain workflow or at what stage in a conversation a user is more likely to exit the bot.
https://github.com/Microsoft/BotBuilder-Samples/tree/master/samples/csharp_dotnetcore
https://github.com/Microsoft/botbuilder-tools/tree/master/packages/MSBot
https://github.com/Microsoft/botbuilder-tools/blob/master/packages/MSBot/docs/bot-file.md
https://blogs.msdn.microsoft.com/martinkearn/2018/10/04/using-bot-files-to-access-external-services-in-bot-framework-v4